How to Create a Campaign on Ero-Advertising
Last updated on March 28, 2019 7 min read
Already read our article about Ero-Advertising, which was a platform overview?
Then this is what you’ve gotta read next!
Today, I’ll focus on the whole process of creating a campaign, showing you how to set up an Ero-Advertising campaign.
I’ll also explain how you can make Ero-Ads’ and Mobidea’s data work together.
In the Chapter 2, you’ll get to check more details about campaign optimization on Ero-Advertising and some other sweet extra tricks.
Let’s go!
Creating a Campaign on Ero-Advertising
Dynamic Tracking
First of all, there’s something that may appear to be of small importance but which is crucial: you’ve gotta implement dynamic tracking.
By adding a short code sentence to your Smartlink, you’ll get that info on Mobidea, bearing the parameters you’ll choose in mind.
The most common and useful parameters are:
- [campaignid] – gives you the ID of the campaign
- [domainid] – gives you the ID of the website in which you’ve gotten a conversion/visit
- [adid] – Unique ID of the ad creative
- [country] – Country name of the visitor
- [timestamp] – The time of the day in which the visitor was redirected
- [tracking] – Unique ID of the click/impression
- [spaceid] – Unique ID of the ad space
All you need to do is add those parameters to the Track1 and Track2 zones of the Smartlink (if you work with Mobidea) and you’re ready to go!
The following examples are Smartlinks without DT (1) and Smartlinks with DT (2):
- http://www.example.com/?sl=35808-6551e&data1=Track1&data2=Track2
- http://www.example.com/?sl=35811-6eac6&data1=[campaignid]&data2=[domainname]
On Ero-Advertising, this tool helps you optimize by letting you match revenues with costs for a parameter.
RON Campaign Creation
Let’s start with the basics:
Creating a RON is very simple and straightforward but you need to be careful with some options that are available to you on the road.
Go to the Advertisers tab -> New campaign -> RON campaigns and you’ll see a small box:
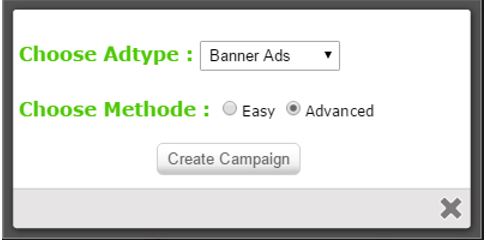
In this case, I’ll explain the Banner Ads campaign because it’s one of the most common ones.
Regarding the next field, it’s better to choose advanced.
Why?
Because it gives you plenty more targeting options for your campaign!
The following image shows the targeting settings available.
As you can see – on top of it – inside a black box, I’ve marked the various tabs you’ll have to fill in so as to get the targeting steps done.

Step #1 – “Common Settings”
Campaign name and group: You can name your campaign and associate it with a group previously created by you (Advertisers -> Campaign groups).
Source Optimizer: In this spot, you should choose “Nothing”. If you don’t, this tool will limit your traffic.
Selected rating: This option selects the kind of traffic. It’s only “on” if you click on the place to target the sites with that specific rating. I advise you to uncheck the box and leave it open to all ratings.
Frequency Capping: choosing the number of times your ads will appear to a specific IP. When starting a campaign, I suggest you go for 1/24 hours.
Select domain filter: This is the place where you can apply website filters in order to blacklist or whitelist domains. When creating a RON campaign for the first time, you don’t have to worry about this because you still have no data to create a white/black list.
Payment type: The bidding system in Ero-Advertising is quite “competition friendly” due to the fact that you can see your position every time you want, just by going to the Banner Ads menu and clicking on your campaign.
Here, you’ll have to be really careful when choosing your bid because in RON campaigns – unlike CPM campaigns (you pay on a SmartCPM basis) – you’re paying on a fixed CPM/CPC model, which means you pay exactly the bid value.
As recommended by Ero-Ads, I choose CPM because of its advantages when compared to CPC.
For further details, check the Mobidea Academy’s essential CPM vs CPC article. Don’t worry: I’ll cover the CPM campaigns subject in the second part of this article.
Daily budget: the budget limit you impose on your campaign on a daily basis. If reached, the campaign will stop and restart on the next day.
My advice: leave a medium range limit; one that you surely don’t want to surpass but that can still give you relevant data to optimize.
Maximum budget: the maximum value you want to spend on the campaign. Once reached, the campaign will stop until you restart it.
I don’t recommend you use this option, as it’s better for you to use a daily max budget in order to control costs.
Time period(s)/Day of the week: the time schedule you want your campaign to be running on. At the beginning, it’s advisable to leave these options open to all days and all hours in order to gather good data. Once you spot trends of conversions for specific hours/days then this may become a valuable tool.
Step #2 – Language Country
The platform gives you more advanced parameters, such as website/browser languages and regions inside each country (if you want a more specific targeting.)
Step #3 – Campaign’s traffic filters
First of all, you’ve gotta select Mobile traffic and then pick the options to display your ads on all types of browsers (WAP+XHTML).

As a starting point, you can start with Android only.
If the campaign performs well, you can later launch it to another OS.
“Connection Type” is one of the most important targeting options.
Select only the carrier from the segment you’re looking for.
On the “Extra filters” pick “All display options”, “Allow all website types”.
As for “Google PageRank” leave it as it is “minimum (…)” so as not to limit the traffic sources.
Step #4 – Choose your Categories
Start by choosing “Straight” as a main category due to its general attribute.
Afterwards, select all categories since you don’t wanna miss any category on a RON campaign.

Step #5 – Overview of the campaign’s targeting option
It’s another way of making sure you’ve selected everything you wanted.
Save it and let’s add banners to it!
Adding Banners and Setting The Bid

Once you save your campaign, you’ll be redirected to this menu to keep configuring it.
As shown on the print screen above, click on “Add ad” to add banners to your campaign so that it can start receiving traffic.
If you check on the bottom of the page you just opened, there’s an option to upload several banners:

See the pop-up window?
That’s where you’re gonna both upload the 3/2 banners and set their features.
Because the bid isn’t made by campaign but by banner, the number of banners you upload will work as a capping somehow.
This means that – the more banners you put – the higher the costs.
Basically, if you put 1/12h capping, your ads will be seen by the same IP 2 times per day, each one of them.
That’s why you should never forget:
The more banners you upload, the higher the impressions/costs.

With the goal of making sure you save time, the following options can be applied to all banners at once just by clicking on the “Use for all banners” box.
Default display URL: it’s a URL that’ll appear on the banner, in a small-size font, while the user sees it. Make sure you use an appealing URL for the segment you’re targeting!
Default destination URL: it’s where you put the Smartlink/Single Offer link.
Default Banner size: it’s where you specify the banner size you’ll be uploading. Tip: pick the size yourself so as to lower the risk of bad size detection.
Default CPM: it’s the place to set the bid. At first, start by inserting an estimate of the bid you wanna start with. It won’t show your position on the segment. Nonetheless, as you’ll change it again in a short time, it isn’t important.
Activate all: it’s the button that allows you to activate all banners as soon as they’re uploaded.
Leave the other boxes/options untouched – as they refer to more complex options – and now you just need to upload the banners and save it!
Bidding
After setting and saving your campaign, you’ll be redirected to the Banner Ads list.
You can click the created campaign and it’ll show the banners you’ve uploaded.
If you click on the edit of each banner, the option to change the bid and the ranking position will become available.
My suggestions vary according to the segment.
Either you can start by the top (1st position) or start from a medium/low position and work from there upwards.
What to do?
Assess the relation between bid value and position on the rankings as carefully as possible.
If the bid you’ve chosen is close to the next position, then it’s worth the effort of paying more.
For example: you’ve put a bid of 1.0€ -> 3rd position and, after simulating higher bids, you realize you can have the 2nd position bidding 1.05€. It’s worth paying more and getting that better quality traffic.
Want more info?
Don’t wait around and start reading a Mobidea Academy article in which we deal with different bidding strategies!
Hope these super detailed tips are gonna help you build your first proper, real-deal campaign so you’ll be able to get that sweet $ asap!


Time for you to go ahead and dive into this analysis of Traffic Factory! Learn the best optimization tips for Traffic Factory right now!

Learn how to effectively optimize successful campaigns on Ero-Advertising, one of the affiliate industry's best-known ad networks!

AdvertisementStill struggling to find the best offers because you know you wanna make money faster like a real master? Lost…